When specific websites refuse to load or throw persistent lookup errors despite an active internet connection, your Windows 11 PC is usually struggling with a corrupted DNS resolver cache. Dealing with broken domain name resolutions can bring your daily workflow to a sudden halt, especially when pages load instantly on your phone but fail entirely on your desktop browser.
Every time you visit a website, your operating system saves the domain’s numerical IP address locally so future visits load faster without querying external servers repeatedly. While this mechanism speeds up everyday browsing, cached records quickly become problematic when a website migrates to a new web host, when your router switches network paths, or when a brief Wi-Fi drop records a failed lookup. Learning how to clear DNS cache on Windows 11 wipes out these stale address records and forces your computer to fetch fresh, accurate routing data from your configured DNS servers.
What Happens When You Clear DNS Cache on Windows 11?
Before your web browser can load any online page, your computer must translate the human-readable domain name into a machine-readable IP address (such as 192.0.2.1 for IPv4 or its alphanumeric IPv6 equivalent). In Microsoft’s operating system, the background process responsible for managing these domain translations is the Windows DNS Client service.
Instead of reaching out across the internet to an external resolver every single time you click a link or refresh a tab, the operating system maintains a temporary local database known as the DNS resolver cache. Whenever a domain name is resolved, Windows stores the resulting IP record in system memory for a specific duration defined by the domain’s Time-to-Live (TTL) parameter. Until that timer expires, your PC consults this local lookup table first before sending any external network requests.
The local resolver database stores three distinct types of routing information:
- Positive Records: Verified domain-to-IP mappings from recent successful connections that allow your browser and desktop apps to connect instantaneously.
- Negative Entries: Cached records of failed lookups indicating that a domain did not respond when your computer last tried to reach it.
- Hosts Mappings: Static address rules preloaded directly from your local Windows hosts configuration file.
Negative cache entries explain one of the most common networking headaches on modern PCs. If your wireless signal flickers for two seconds right as you try to open a webpage, the lookup fails and Windows records that failure as a negative entry. Even after your internet stabilizes ten seconds later, your system continues reading its own negative cache entry and blocks the site until the TTL expires or you manually clear DNS cache on Windows 11.
Common Signs You Need to Clear DNS Cache on Windows 11
Knowing when to purge your local resolver database saves hours of unnecessary router reboots and browser reinstallations. Performing a quick flush directly resolves several distinct networking, development, and privacy issues:
- Browser Errors: You encounter persistent error codes like DNS_PROBE_FINISHED_NXDOMAIN or ERR_NAME_NOT_RESOLVED on specific sites while others load normally.
- Website Migrations: A webmaster recently moved a domain to a new server or updated its nameservers, but your PC still loads the old host.
- DNS Switching: You updated your network adapter settings to use a faster public resolver like Cloudflare or Google Public DNS, but old cached answers remain active.
- VPN Toggling: You disconnected from a Virtual Private Network (VPN) or proxy, and regional sites are still routing through the previous tunnel path.
- Privacy Cleanup: Anyone with local access to your PC can run a single command to view every domain resolved recently unless you clear the resolver list.
When any of these symptoms appear, taking thirty seconds to clear DNS cache on Windows 11 forces your network adapter to discard old assumptions and request updated routing records immediately.
How to Inspect Your Current DNS Cache Before Flushing
If you are troubleshooting a stubborn domain or working on a web development project, you may want to see what IP addresses your computer has stored in memory before wiping them out. Viewing the cache does not alter your network settings and confirms whether an outdated IP address or a negative lookup record is blocking your connection.
To view the complete contents of your local cache, open Command Prompt and run the following command:
Plaintext
ipconfig /displaydns
Because that command outputs a long scrolling list of every background service, telemetry endpoint, and website your PC has contacted recently, scanning it manually can take time. If you use Windows PowerShell and want to check whether a specific domain is stuck in memory before you clear DNS cache on Windows 11, run this native cmdlet to display a formatted table:
Plaintext
Get-DnsClientCache
Checking the Status column in the PowerShell output tells you immediately if a domain is saved as a working record or if the operating system has locked it out with a cached NotExist status.
Method 1: Clear DNS Cache on Windows 11 Using Command Prompt
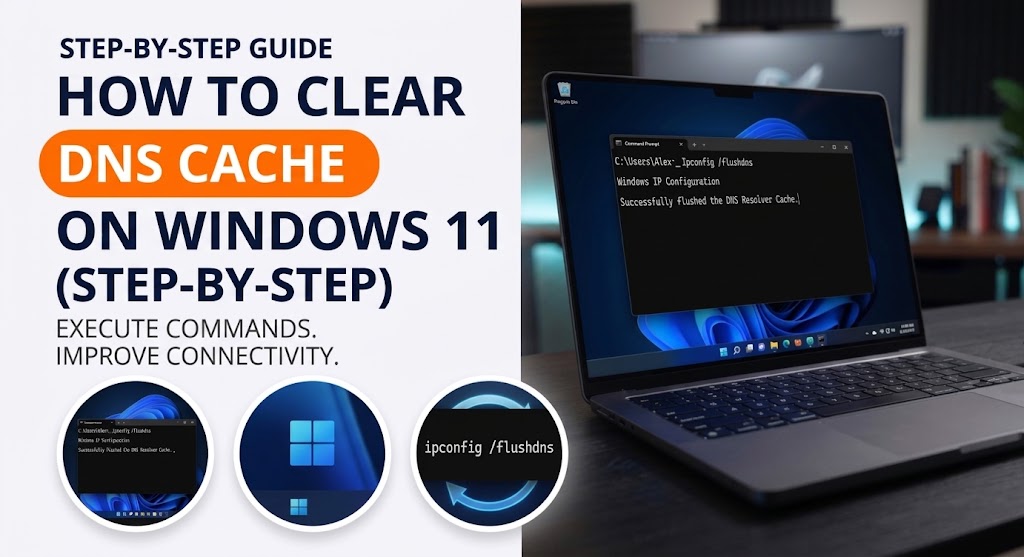
Using the classic Windows Command Prompt remains the most reliable way to clear DNS cache on Windows 11. Unlike silent background shortcuts, Command Prompt provides an explicit text confirmation on screen so you know for certain the flush succeeded.
- Press the Windows Key on your keyboard and type cmd into the search bar.
- Right-click Command Prompt in the search results and select Run as administrator.
- Click Yes if the User Account Control prompt asks for permission to make changes to your device.
- Type
ipconfig /flushdnsinto the terminal window and press Enter.
Within a fraction of a second, the console window will return the confirmation message:
Plaintext
Windows IP Configuration

Successfully flushed the DNS Resolver Cache.
Running Command Prompt with administrator privileges is technically optional on standard home user accounts, as Microsoft allows standard users to flush their own session cache. However, opening an elevated administrator window prevents permission errors on managed work laptops or systems where local group policies restrict network configuration commands.
Method 2: Clear DNS Cache on Windows 11 via Windows PowerShell
Microsoft uses Windows Terminal with a PowerShell profile as its default command-line environment when you right-click the Start button. While the classic ipconfig /flushdns utility still works inside PowerShell, you can also use Microsoft’s native PowerShell cmdlet built specifically for managing the DNS client module.
- Right-click the Start Button on your taskbar and select Terminal (Admin).
- Verify that the active tab at the top of the window is set to Windows PowerShell.
- Type
Clear-DnsClientCacheinto the console and press Enter.
Unlike Command Prompt, the native Microsoft Clear-DnsClientCache cmdlet executes silently. When you press Enter, the blinking cursor simply drops to a new line without displaying a success banner. If you want to clear DNS cache on Windows 11 via PowerShell and still see visual confirmation that the command worked, append the verbose parameter:
Plaintext
Clear-DnsClientCache -Verbose
Adding that flag forces PowerShell to print a yellow diagnostic message confirming that it executed the target operation on your local machine.
Method 3: Clear DNS Cache on Windows 11 Using the Run Dialog Box
Once you memorize the flush command, you do not need to search the Start menu or wait for a full terminal environment to initialize. You can clear DNS cache on Windows 11 in under three seconds directly from the Windows Run dialog box.
- Press Windows Key + R on your keyboard to open the Run utility.
- Type
ipconfig /flushdnsinto the Open text field. - Press Enter or click OK to execute the command.
When you use this shortcut, a black command window flashes on your screen for a split second and closes automatically as soon as the resolver cache is purged. If you want the speed of the Run box but want the window to stay open so you can read the confirmation message, run this modified string instead:
Plaintext
cmd /k ipconfig /flushdns
The /k switch instructs the Windows command interpreter to execute the flush command and keep the console window active afterward so you can verify the result.
Method 4: Clear Browser-Level DNS Host Cache (Chrome, Edge, and Firefox)
One of the biggest reasons a webpage still fails to load after you clear DNS cache on Windows 11 is that modern web browsers maintain their own independent DNS caches. Even if you wipe the operating system resolver list clean, Google Chrome, Microsoft Edge, and Mozilla Firefox will continue using their internal browser host cache unless you clear that too or completely restart all running browser processes.
If you already flushed your system cache and a website still throws an error, purge your browser’s internal resolver table using the steps below.
Google Chrome:
- Open a new tab in Google Chrome.
- Type chrome://net-internals/#dns into the address bar and press Enter.
- Click the Clear host cache button next to the host resolver cache label.
- Select Sockets in the left sidebar and click Flush socket pools to drop active connections.
Microsoft Edge:
- Open a new tab in Microsoft Edge.
- Type edge://net-internals/#dns into the address bar and press Enter.
- Click the Clear host cache button to purge saved domain records.
- Click Sockets in the left menu and select Flush socket pools.
Mozilla Firefox:
- Open a new tab in Mozilla Firefox.
- Type about:networking#dns into the address bar and press Enter.
- Click the Clear DNS Cache button located above the hostname table.
Clearing both the operating system cache and the browser socket pool guarantees that your next page refresh initiates a brand-new domain lookup from scratch.
Troubleshooting When You Cannot Clear DNS Cache on Windows 11
Occasionally, attempting to clear DNS cache on Windows 11 returns a system error stating: Could not flush the DNS Resolver Cache: Function failed during execution. Other times, the flush succeeds, yet your internet browser still cannot resolve web addresses. When that happens, deeper network stack issues require attention.
Fix the “Function Failed During Execution” Error
This error occurs when the background Windows DNS Client service (Dnscache) is stopped or disabled. Because the local resolver table lives inside that service, Windows cannot flush a cache that is not currently running.
- Press Windows Key + R, type services.msc, and press Enter.
- Scroll down the alphabetical list and locate DNS Client.
- Check the Status column to verify that it says Running.
- If the service is stopped, right-click DNS Client and select Start.
In newer builds of Windows 11, Microsoft greys out the manual Stop and Restart buttons for the DNS Client service inside the graphical Services window to protect system stability. If the options are greyed out and the service is unresponsive, restarting your computer or resetting the network stack via the command line will restore normal operation.
Perform a Complete Windows 11 Network Stack Reset
If you clear DNS cache on Windows 11 and still cannot reach working websites, your local DHCP IP lease or Windows Sockets (Winsock) catalog may be corrupted. You can reset your entire local networking stack by running five sequential commands in an elevated Command Prompt (Admin) window.
Run each command below one by one, pressing Enter after each line:
- Flush the resolver cache:
ipconfig /flushdns - Re-register your computer’s DNS names:
ipconfig /registerdns - Release your current local IP address lease:
ipconfig /release - Request a fresh IP address from your router:
ipconfig /renew - Reset the Winsock catalog to default settings:
netsh winsock reset
Note that running ipconfig /release will temporarily disconnect your PC from the internet until you execute ipconfig /renew a few seconds later. Once all five commands finish executing, restart your computer to complete the Winsock reset.
Frequently Asked Questions (FAQ)
Does it delete passwords when you clear DNS cache on Windows 11?
No, when you clear DNS cache on Windows 11, it does not affect your personal files, web browser history, cookies, autofill data, or saved passwords. Your login sessions and passwords are stored inside your web browser’s encrypted profile folder, whereas the DNS resolver cache only holds temporary domain-to-IP address routing tables in system memory.
Will flushing DNS slow down my internet connection?
Flushing your DNS cache will not lower your internet bandwidth or download speeds. The very first time you visit a website immediately after a flush, your browser may take a few extra milliseconds to ask your DNS server for the website’s IP address. Once that first lookup completes, Windows 11 automatically caches the new record, restoring instantaneous lookup speeds.
How often should you clear DNS cache on Windows 11?
You do not need to clear DNS cache on Windows 11 on a daily or weekly schedule because the operating system automatically purges individual records whenever their Time-to-Live (TTL) timer expires. You only need to perform a manual flush when troubleshooting connection errors, after modifying your hosts file, after switching DNS servers, or when clearing local domain history for privacy.
Keeping Your Windows 11 Network Responsive
Taking a moment to clear DNS cache on Windows 11 is one of the safest, most effective diagnostic steps you can perform whenever your computer struggles to load websites properly. Whether you prefer the classic confirmation message of ipconfig /flushdns in Command Prompt, the streamlined Clear-DnsClientCache cmdlet in PowerShell, or a quick keyboard shortcut through the Run dialog box, purging stale IP records ensures your PC always routes traffic to the right server. When paired with a quick browser host cache reset, you can resolve almost any domain resolution glitch in under a minute without rebooting your router or reinstalling network drivers.
